-
![]()
Official licensed product of the NHL
Want Some Professional Help With Installation?
New England customers, 360 Sportscapes is now our authorized YardRink installer. 360 is the #1 residential ice rink builder in New England and they specialize in customizing rinks to fit your yard.
360 Sportscapes can be reached at (877) 937-4360 or by e-mail atinfo@360sportssystems.com.
Read more here.
Setup
-
1
![]()
Rake and Level
Choose a location with no more than 10” of slope in any direction. Remove all sharp rocks.
Pro Tip: Straw can be used to cover rocks and level the ground. -
2
![]()
Spread Tarp
As shown, lined and marks should face up.
Pro Tip: In windy conditions, use Panels to help hold up Tarp in position. -
3
![]()
Place Panels
To form long walls, align the bottom inside edge of the Straight Panels with the blue lines woven into the Tarp. Form each corner by placing Curved Panels.
Pro Tip: Short lines on the Tarp indicate the center of each side of the rink. -
4
![]()
Connect Links
At each Link overlap: first pass a Hex Bolt through the end of both Links and carefully engage its thread. Then pull the Panels together snugly, as shown. Then using the Hex Bolt Driver, tighten the Hex Bolt to interlock the mating teeth on each Link. Do Not Over Tighten Bolts.
-
5
![]()
Attach Tarp
To attach the Tarp, wrap Cable Ties as shown and pull the tarp tightly toward the Link. Use a Cable Tie for every eyelet.
If desired, the free end of each Cable Tie can be trimmed with scissors or a wire cutter. -
6
![]()
Install Stakes
Along every straight wall, tuck the Tarp into the Vee at each end of every Straight Panel. Then, in each, angle the stake slightly toward the rink, taking care not to pierce the tarp. Hammer the Stake into the ground. Wear goggles and gloves.
Important: Drive each Stake flush with the top of both adjacent Panels. If not possible, cut the top of the Stake flush. -
7
![]()
Fill Panels
As shown, use a hose to fill each Panel. Capacity is about 7 gallons; filling typically takes 40 seconds.
There is no need to wait for the water in the Panels to freeze before moving to Step 8. -
8
![]()
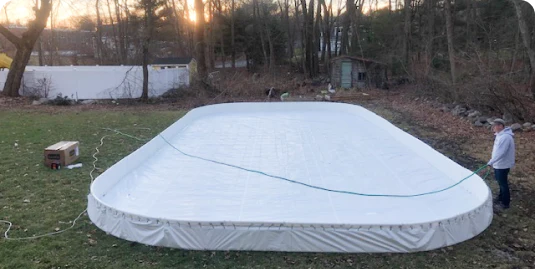
Fill Rink. Enjoy!
Fill minimum depth of 4 inches. The skating surface may day a few days to freeze, depending on the weather.
Note: Starter Rink shown.
Take Down
-
1
![]()
Drain Rink
To start draining your rink, choose a deep water location which will not drain into nearby buildings. At that spot, cut several Cable Ties and then fold down the Tarp edge to release a controlled flow of rink water. As the level of the remaining water decreases, work your way around the rink cutting additional Cable Ties.
-
2
![]()
Remove Stakes
Remove all Stakes from the ground. Wear goggles and gloves for safety.
Save the stakes for next winter! -
3
![]()
Empty Panels
Once the rink is empty, cut all remaining Cable Ties and unscrew all Hex Bolts. Tip over each Panel to empty it.
Save the Hex Bolts for use next winter! -
4
![]()
Stack Panels & Store
For off-season storage, stack Panels head-to-toe. (You may wish to use the shipping boxes.)
If your Tarp is in reusable condition, allow it to dry thoroughly before folding.
Store your YardRink in a garage or other suitable area to enjoy next winter!
Remember to order new Cable Ties.
Everything You Need
Starter Rink
Standard Rink
| Tarp | Straight Panel | Curved Panel | Hex Bolts | Hex Bolt Driver | Cable Ties | Stakes |
|---|---|---|---|---|---|---|

|

|

|

|

|

|

|
| White, oval, triple-laminate with woven-in blue lines. | UV-resistant HDPE and a factory-installed Link. | UV-resistant HDPE and a factory-installed Link. | Supplied in pack of 50 + driver | Use with a cordless drill | UV-resistant, high tensile strength(package includes extra) | White fiberglass |
| Rink Size 17’ x 35’ | 12 (6 per side) | 16 | 28 required | 1 | 200 | 14 |
| Rink Size 26’ x 53' | 30 (12 per side, 3 on each end) | 16 | 46 required | 1 | 300 | 35(+1 spare) |
| Tarp | Straight Panel | Curved Panel |
|---|---|---|

|

|

|
| White, oval, triple-laminate with woven-in blue lines. | UV-resistant HDPE and a factory-installed Link. | UV-resistant HDPE and a factory-installed Link. |
| Rink Size 17’ x 35’ | 12 (6 per side) | 16 |
| Rink Size 26’ x 53' | 30 (12 per side, 3 on each end) | 16 |
| Hex Bolts | Hex Bolt Driver | Cable Ties | Stakes |
|---|---|---|---|

|

|

|

|
| Supplied in pack of 50 + driver | Use with a cordless drill | UV-resistant, high tensile strength(package includes extra) | White fiberglass |
| 28 required | 1 | 200 | 14 |
| 46 required | 1 | 300 | 35(+1 spare) |
Required Items
-
![]()
Cordless Drill (variable speed)
-
![]()
Scissors or Wire Cutters
-
![]()
Hose
-
![]()
Saw (if Stakes cutting is required)
-
![]()
Sledge Hammer
-
![]()
PPE: Goggles & Work Gloves
Got Questions?
- Email CustomerCare@YardRink.com
- Call 1-888-622-RINK
America's fastest growing rink brand
SHOP NOW-
![]()
Official licensed product of the NHL


